Grout Is a Maintenance Job, Not a Scrubbing Job
How to clean and maintain tile grout without wrecking it: the safe cleaning ladder, when bleach is warranted, sealing, and the habits that keep it light.
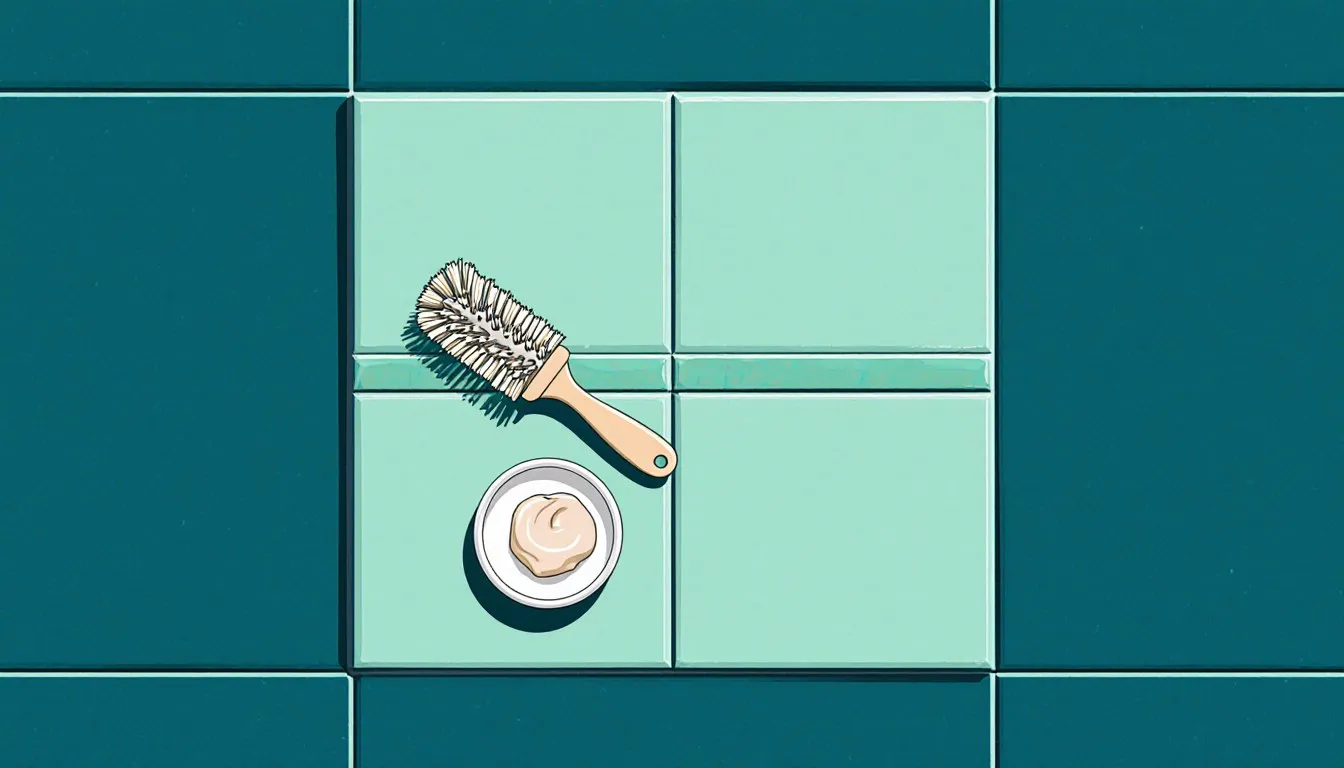
That gray or black line between your tiles is almost always surface mildew and trapped soap film sitting on top of intact grout, and it comes off with a stiff brush, hot water, and about ten minutes of honest work per shower wall. The heroic scrubbing most people do is the price of skipping the ten-minute version for two years. Below: how to tell dirty grout from failing grout in one look, the cleaning ladder from free to expensive, the honest answer on bleach, how to find out whether your grout is sealed (which changes everything else), and the point where scrubbing stops being the answer.
Is that grout dirty, mildewed, or actually failing?
Take a fingernail or the corner of a plastic putty knife and press it into the darkest section of the grout line. If the surface is firm and nothing comes away but a little grime, you have a cleaning job. If the grout crumbles, powders, or gives up sand, you have a repair job, and no cleaner in the aisle will fix it.
That one check saves people entire weekends. I have watched a neighbor spend a Saturday with a toothbrush and a bottle of something blue on a shower floor where the grout was already sandy and hollow behind the tile. She got it a shade lighter. Two months later it was dark again, because the darkness was coming from underneath, not from the surface.
The three things you are sorting between:
- Trapped soil and soap film: dull, even graying along the whole line, usually worst in traffic paths on a floor or at the bottom third of a shower wall. Firm to the fingernail. Cleans up.
- Surface mildew: spotty or streaky black and dark green growth, concentrated where water sits longest, the bottom corners of a shower, the perimeter of a tub, the grout under a soap dish. Firm to the fingernail. Cleans up, though it may not go all the way back to white.
- Failing grout: cracks, crumbling, missing sections, a hollow sound when you tap the tile beside it, or a line that keeps darkening within days of a good cleaning. Water is getting behind the tile and the darkness is moisture and soil in the substrate. Does not clean up.
People get scared here, so let me be plain about the mold question. Cosmetic mildew on a bathroom grout line, the kind that lives on soap residue in a wet corner, is an ordinary cleaning job for a homeowner in a ventilated bathroom with gloves on. What is not an ordinary cleaning job: growth spreading across a large area, growth on the wall or ceiling above the tile, a musty smell that stays after the room dries, or any sign that water has been running behind the tile for a long time. Federal guidance on mold cleanup draws a line around ten square feet, roughly a three-by-three-foot patch, as the point where a homeowner should stop and get an assessment rather than start scrubbing. That is a sensible place to draw your own line too. Growth that size is telling you about a leak, and cleaning the visible part does nothing about the leak.
One more tell worth knowing. If the dark line runs along the joint where the tile meets the tub, the floor, or another wall, and it looks rubbery rather than cement-like, that is caulk, not grout. Caulk in a corner is supposed to be flexible, it grows mildew readily, and it is meant to be cut out and replaced every few years rather than cleaned forever. Trying to scrub old, mildew-stained silicone back to white is a losing errand. Cut it out with a utility knife, dry the joint completely, and lay a fresh bead.
Why does grout get dirty faster than the tile next to it?
Grout is porous cement and tile is a glazed, fired surface, so water, soap film, and soil soak into one and slide off the other. That is the whole explanation. Your tile is a plate; your grout is a sponge cut into strips and set an eighth of an inch lower than everything around it.
Being lower matters as much as being porous. Every drop of dirty mop water, every bit of shampoo runoff, every crumb of shoe grit ends up in the lowest channel available, which is exactly where the absorbent material lives. Then it dries there. Do that a few hundred times and the grout line is a compressed record of everything that has washed across that floor.
Two more things are worth knowing about your particular grout, because they change how gently you have to work.
Sanded grout has fine sand in the mix and is used in wider joints, typically an eighth of an inch and up, which covers most floors. It is coarse to the touch and it will hold soil in its texture. Unsanded grout goes in narrow joints, often on walls and in showers, and is smoother and softer. Both are porous. Neither one loves abrasives, but unsanded grout in a narrow shower joint is the one that wears visibly if you go at it with a wire brush and a scouring powder every month. There is also epoxy grout, which is a different animal entirely: it is essentially plastic, it does not absorb, it never needs sealing, and if yours is epoxy you already know because it cost more and the installer complained about working with it.
The practical upshot: soil sitting on porous cement wants a brush and a solution that lifts it, not a hard scouring that takes a little grout with it each time. Use the gentlest thing that works and go over the line twice rather than once with something aggressive. Two passes with a nylon brush cost you four minutes; a joint scoured thin has to be dug out and replaced.
How often should you actually clean grout?
There is no single number, because a shower and a hallway are not the same problem. A shower needs attention weekly, a kitchen floor every month or so, and a low-traffic hall floor can go a season between real cleanings. Water and foot traffic set the interval. Count how often a surface gets soaked and how many shoes cross it, and you have your schedule.
Here is the routine I would actually keep, sorted by how the room gets used.
- Shower and tub surround, weekly: a quick pass with a brush and whatever mild cleaner you already use in there, focused on the bottom third of the walls and the corners. Under a minute per wall if you have not let it go.
- Bathroom floor, monthly: the grout around the toilet base and in front of the sink does most of the dirtying. The rest of the floor mostly needs to not be mopped with a dirty mop.
- Kitchen floor, monthly: grease is the operator here. Cooking oil aerosolizes, lands, and combines with foot traffic to make a film that plain water will not move. A degreasing dish soap solution handles it.
- Entry and mudroom, monthly in wet or snowy seasons, less otherwise: road salt and grit are hard on grout and get ground in by shoes.
- Hallways and bedrooms, seasonally: a real brush-and-solution cleaning two to four times a year is plenty.
The number that matters more than any of these is how long a spill sits. Wine, coffee, tomato sauce, and pet accidents on unsealed grout become stains in hours, not days. Blot them up the same day and most of them never become a cleaning project at all.
If you have inherited a house where nobody did any of this, do not budget your weekend around the whole floor. Clean one room, see how it goes, and find out what you are dealing with before you commit. A test patch in a corner tells you in fifteen minutes what a full afternoon would tell you the hard way.
What’s the safest way to clean grout without wearing it down?
Start with the cheapest, gentlest thing that could work and stop the moment the grout comes clean. Most grout that people attack with harsh chemicals would have surrendered to hot water and a stiff nylon brush, because a large part of what is sitting there is soap film, which is water-soluble and mostly just needs agitation.
Rung one: dry brush, then hot water
On a floor, vacuum or sweep first, and get the grit out of the grout lines specifically. Wet grit becomes mud that you then push around with a mop and press back into the joints. On a shower wall, skip the dry step and go straight to hot water.
Then: hot water, a stiff nylon brush, and short back-and-forth strokes along the line. A grout brush with a narrow head costs a few dollars and works better than a toothbrush because the bristles are stiffer and the handle gives you leverage. An old toothbrush is fine for corners and for testing a spot. Let the tool do the work; if you are leaning on it hard enough to feel it in your shoulder, you are sanding a little of the joint away with every stroke.
A stiff nylon brush is the ceiling on stiffness for most jobs. Wire brushes and metal scrapers belong on masonry, not on a bathroom joint you would like to keep.
Rung two: dish soap in warm water
About a tablespoon of grease-cutting dish soap in a gallon of warm water, and no more than that, covers a startling amount of kitchen and bathroom grout. Work it in with the brush, let it sit two or three minutes so it has time to loosen the film, then scrub and rinse.
Rinsing is the step everybody shortchanges, and it is the reason grout sometimes looks worse a week after cleaning than it did before. Soap left in a porous joint is a sticky surface waiting for dust. Rinse with clean water, change the water when it goes cloudy, and wipe the tile down afterward with a damp cloth rather than letting the dirty solution dry in place.
Rung three: a baking soda paste
Baking soda mixed with water to a thick paste is a mild abrasive and a mild alkali, which suits it well to greasy and organic soil. Spread it along the line with a gloved finger or an old brush, give it ten minutes, scrub, and rinse thoroughly.
A note about the vinegar half of the internet’s favorite trick. White vinegar is an acid, and acid attacks cement. On sealed grout an occasional dilute vinegar pass is survivable; on bare, unsealed cement grout, a habit of vinegar is a slow way to eat the joint, and on natural stone tile like marble or travertine, vinegar will etch the stone itself and that damage does not wash off. The baking-soda-and-vinegar volcano that shows up in every cleaning video is also chemically pointless once it stops fizzing: the acid and the base neutralize each other, and what you are left with is salty water and a mess. If you want the deeper soak that actually earns its reputation, that is the peroxide route, and cleaning grout with hydrogen peroxide and baking soda covers how to run it properly.
Rung four: a bought cleaner
When the free and cheap rungs have not done it, a pH-neutral tile and grout cleaner is the next honest step, and it is the right first purchase for anyone with natural stone, where acidic and strongly alkaline products are off the table. Alkaline grout cleaners hit greasy soil harder and are fine on ceramic and porcelain with cement grout. What you are reading on the label is the pH. Neutral, often printed as pH 7 or as safe for natural stone, is the one for marble, travertine, and limestone; alkaline is the one for cooking grease on porcelain or ceramic. Buy the concentrate rather than the ready-to-spray bottle if the choice is there, because a jug you dilute yourself costs less per bucket and usually carries a household through a year of monthly cleanings.
Whatever you buy, test it in a closet corner or behind the toilet first, follow the dwell time on the label rather than your instincts, and rinse it out completely. And one rule that has no exceptions: never combine two cleaning products in a bucket to make something stronger. More on that next.
The knees problem
An hour down on tile on your knees is why floor grout gets put off until it is a project, and knees get a vote. A stiff-bristle deck brush on a long handle will do a whole kitchen floor’s grout lines standing up, at maybe eighty percent of the effectiveness of hand scrubbing, and eighty percent done four times a year beats a hundred percent done never. Save the hands-and-knees session for the entry mat area and the spots in front of the sink and stove.
Should you ever use bleach on grout?
Diluted chlorine bleach has a real place on white or light-colored cement grout with mildew staining that gentler methods did not lift, and it has no place at all in a general cleaning routine. Use it as a spot treatment when you need it, and understand what it is doing: bleach kills and decolorizes the mildew stain, it does not clean, and it will not remove the soap film and soil holding the mildew there. Clean first, bleach second, or you are just bleaching dirt.
The safety rules here are not negotiable, and I am going to state them flat rather than dressed up.
- Never mix bleach with ammonia. The reaction produces chloramine gas, which injures lungs at concentrations you will smell but cannot escape fast enough in a small bathroom. Many glass cleaners contain ammonia, so this is not a hypothetical mixing accident; it is one of the most common poisoning calls there is.
- Never mix bleach with an acid, including vinegar and many toilet bowl and tile cleaners. That combination releases chlorine gas.
- Never mix bleach with any other cleaning product, full stop. If you do not know what is in the bottle, treat it as something that will react.
- Ventilate: window open, exhaust fan running, door open. Bathrooms are small, sealed rooms, which is exactly the wrong place for fumes.
- Gloves and eye protection, and old clothes, because bleach splash on a towel or a shirt is permanent.
- Rinse the surface fully afterward, and rinse anything the runoff touched.
- Read the label, and follow its dilution. On a cleaning product the label is the law, and the manufacturer has tested things you have not.
Beyond safety, chlorine bleach has practical limits on grout. It is hard on colored grout and will lighten it unevenly, which turns a stain problem into a patchwork problem. Repeated use on cement grout can degrade the surface over time. And bleach does not penetrate: a stain that has soaked deep into an unsealed joint may look better wet and come back gray as it dries, because you only decolorized the top layer.
Oxygen bleach, the sodium percarbonate powder sold as a color-safe laundry booster, is the better call in most grout situations. Mix it at roughly two tablespoons of powder per gallon of hot tap water, about 120 to 130 degrees Fahrenheit (49 to 54 Celsius), which is hot enough to dissolve the powder fully and cool enough to keep your gloved hands in it. Go up toward four tablespoons a gallon for heavy staining on a floor, and check the carton, because scoop sizes and concentrations differ between brands and the label ratio wins over mine. It releases hydrogen peroxide as it dissolves, and it works slowly through a dwell time rather than instantly. It is far gentler on colored grout, it does not produce chlorine fumes, and it handles organic staining well. The tradeoff is patience: give it fifteen or twenty minutes on the joint instead of expecting a two-minute result. For most homeowners staring at a dingy floor, a warm oxygen bleach solution left to sit and then brushed out is the highest-value thing in this entire article.
What I would not do: use chlorine bleach on natural stone, on colored grout you care about, or on any schedule at all. It comes out for one stubborn stain, does its job, and goes back under the sink until the next one.
Is your grout sealed, and why does that change how you clean it?
Flick a few drops of water onto the grout line and watch for thirty seconds. If the water beads up and sits there, you have a working sealer. If it soaks in and darkens the grout, the joint is bare, and everything you do from here needs to be gentler and every spill needs to be blotted faster.
Run that test in a few places, because sealer wears unevenly. The grout in the traffic path through your kitchen may be bare while the grout under the table still beads. Test in front of the sink, in the doorway, and in a corner nobody walks on, and you will learn more about your floor in two minutes than a full cleaning would tell you.
What sealed grout buys you is time and tolerance. A penetrating sealer soaks into the cement and lines the pores so liquids sit on the surface long enough to be wiped up instead of soaking in. Sealed grout resists staining, cleans faster because the soil never got a grip, and puts up with a wider range of cleaners without visible harm. It is not a force field. Sealer will not stop a spill left overnight, it will not keep mildew from growing on soap residue lying on top of it, and it will not save a joint that is already crumbling.
Bare grout wants a shorter list: hot water, mild dish soap, oxygen bleach for staining, and prompt blotting of anything that spills. Skip the acids, go easy on the abrasives, and get it sealed once it is clean and fully dry.
Two other things the water test tells you. If water beads in some spots and soaks in a foot away, it is time to reseal the whole area rather than patch it, because a partial reseal will show as a difference in sheen. And if your grout looks glossy, feels slick, or has a plasticky film that is flaking or turning cloudy, somebody used a topical sealer or a coating rather than a penetrating one, and that has to be stripped before anything new goes on. Getting a failing film off is its own job, and there is a walkthrough on how to remove grout sealer from tiles for when you hit that.
How often does grout need to be resealed?
Anywhere from about once a year to every several years, and the honest answer is that your water beads until it doesn’t. The water test tells you when, and it is more reliable than any interval I could give you, because the variables that drive it are wildly different from house to house.
What actually moves the number:
- Water exposure: a shower floor is the hardest service grout ever sees. It gets soaked daily, scrubbed regularly, and hit with soap and shampoo constantly. Shower grout needs resealing far more often than anything else in the house. A guest bathroom used twice a year is at the other end of that range.
- Foot traffic and grit: an entry or kitchen floor abrades. Shoes carrying sand and road grit abrade the sealer off the high points of the joint, which is why an entry floor goes bare a year or two ahead of the guest bath.
- Sealer type: penetrating sealers vary a lot in how long they hold, and the better ones cost more per bottle and last considerably longer, which usually makes them the cheaper choice per year. If you want the comparison, grout sealer reviews sorts out what holds up.
- How it was applied: sealer applied to grout that was not fully cured, not fully clean, or not fully dry does not bond well and fails early. A shower resealed over a joint that felt dry on top but was still holding water underneath can start drinking again inside six months, and the bottle gets the blame for it.
- Cleaning products: harsh and acidic cleaners strip sealer. If you have been going at the floor with something aggressive, expect the sealer to have a shorter life.
The application itself is straightforward and almost entirely about preparation. The grout must be clean, because you are about to lock in whatever is down there, and it must be completely dry, which for a shower usually means a full day or more of not using it, longer in humid weather. New grout needs its full cure time before sealing, and that time is on the grout manufacturer’s bag, not in my head. Then you apply the sealer to the joint, let it soak the time the label specifies, and wipe the excess off the tile face before it dries, or you will be scrubbing haze off your tile instead of admiring your work.
Put the date somewhere you will find it: a note on your phone, a line inside the vanity door, whatever you will actually see. Sealing is one of those jobs nobody remembers doing and everybody wishes they had.
Does the cleaning routine change by tile type?
The grout is the same cement in every case, so the cleaning ladder holds. What changes is what the tile beside it will tolerate and what it will show, and that decides which cleaner you reach for and how much rinsing you do.
Porcelain is dense, hard, and nearly nonabsorbent, which is why it ends up on floors that take real traffic. It shrugs off most cleaners. Its quirk is that the mass-market floor cleaners people mop with leave a residue that builds into a dull film, and then folks blame the tile. Rinse-free mop solutions are the usual culprit. For a floor that has gone cloudy, this walkthrough on cleaning porcelain floor tiles gets into the residue problem properly and how to strip the buildup back off.
Ceramic is softer than porcelain and its glaze is thinner, which matters more at floor level than it sounds. A scouring powder used every week takes the shine off the traffic path first, and once the glaze carries fine scratches it holds soil down in them and never quite looks clean again. I dulled about four feet of a kitchen floor in front of a dishwasher that way, and nothing gentler brought it back. To find out which one you have, look at a cut edge at a threshold or at any tile that has ever chipped: porcelain is usually the same color all the way through the body, while ceramic shows pale tan or white clay under a thin skin of glaze. The chip tells you for free what a sample tile would cost you a trip to find. Those unglazed edges also drink liquid, so a colored cleaner flooded across a ceramic floor can leave a faint tea line along the joints that no amount of rinsing pulls back out. Try any colored product in a doorway corner and give it a full day before you commit the room.
Glass tile is the one that punishes sloppy technique. It shows every water spot, every streak, and every trace of residue, so the finishing wipe matters more than the scrubbing did. Squeegee or dry it with a lint-free cloth rather than letting it air dry, and keep abrasives away from it entirely. The method that works on a glass backsplash is the window washer’s: brush the grout lines first with a mild solution, rinse the whole panel with clean water so nothing has a chance to dry in patches, then dry it in one direction with a flour sack towel while the glass is still fully wet. Wiping a half-dried panel is where the streaks people blame on their cleaner actually come from.
Natural stone is the category where a wrong cleaner does permanent damage. Marble, travertine, limestone, and their relatives are calcium-based and etch on contact with acid. Vinegar, lemon juice, and many bathroom cleaners will leave dull spots you cannot polish out at home. Stone gets pH-neutral cleaner only, and it wants its own sealing schedule for the stone itself, not just the joints.
One thing worth saying about grout color while we are here. Dark grout hides ordinary soil well and then shows soap scum, hard water film, and mineral deposits more plainly than light grout does, because those deposits dry pale. Light grout shows every bit of soil and comes back to looking new more convincingly once cleaned. If you are picking color for an installation that has not gone in yet, a simple guide to choosing tile grout colors is worth reading before the tile goes down rather than after.
When is grout past cleaning and into repair or replacement?
When it crumbles, cracks, or is missing, stop scrubbing. Cleaner cannot restore a joint that has lost its integrity, and every hour spent scrubbing a failing line is an hour water spends getting behind your tile.
The signs that move a job out of the cleaning column:
- Grout that powders or comes away as sand under a fingernail or a putty knife corner.
- Cracks running along a joint, or gaps where the grout has pulled away from the tile edge.
- Missing sections, however small. A quarter inch of missing grout in a shower is a direct path to the wall behind it.
- Tile that sounds hollow when you tap it, or that shifts under foot pressure. That is a bond failure under the tile, and regrouting the top will not address it.
- Grout that turns dark again within days of a thorough cleaning, in the same spot, every time. Something behind it is wet.
- A persistent musty smell in the room after everything has dried out.
Repairing a failed section means removing the old grout to a decent depth before new grout goes in, which is done with a grout saw or an oscillating tool with a grout blade, patiently, without chipping the tile edges. It is genuinely doable for a homeowner, it takes longer than you expect, and the tile edges are what you are protecting the entire time. Grout removal tips covers the technique and the tool choice, and how to grout tile floors picks up from there for putting new grout in.
The stop-and-call line: if water has been getting behind tile long enough to soften the substrate, if a floor flexes underfoot, if the tile is on a wall that has a plumbing wall behind it and you are seeing damage on the other side, or if the tile predates about 1980 and you would be cutting or grinding, stop. Old floor tile, mastic adhesives, and backing materials from that era can contain asbestos, and grinding them makes the problem airborne. A licensed tile contractor, and testing before demolition on an old installation, is the right call, and it is a cheaper call than a subfloor.
Some grout is structurally fine and just permanently, hopelessly discolored, which is a different problem with a different answer. Grout colorant is a stain-and-seal product that recolors a clean, sound joint without pulling any of it out, and it will take a dingy gray line to a uniform color in an afternoon. It has real conditions attached, mostly that the grout underneath has to be cement, clean, and dry. How to change grout color runs through whether yours qualifies. And sometimes the answer is that a fifteen-year-old shower floor owes you nothing and the money is better spent on the retile than on the fourth weekend of scrubbing it.
What keeps grout from getting dirty again?
Everything above is recovery work. The maintenance loop that keeps you out of it is short enough to describe in a paragraph, which is fortunate, because a long one would not get done.
In the shower: squeegee the walls after the last shower of the day, and run the exhaust fan during the shower and for a good stretch afterward, twenty minutes or more, long enough for the mirror to clear and the walls to feel dry to the touch. Mildew needs moisture that lingers, and a room that dries out in half an hour does not give it the window. If your bathroom has no fan, crack the window and leave the door open; if it has a fan that just moves the air around the room without venting outside, that fan is decoration, and getting a real one ducted outdoors is the highest-return improvement that room can get.
On floors: mats at the doors so the grit stays outside, a broom or vacuum more often than a mop, and clean water in the bucket when you do mop. A dirty mop redistributes soil into grout lines with real efficiency. Wring it out properly, too, because standing water is exactly what porous joints do not need.
Everywhere: blot spills the day they happen, keep a sealer on the joints and reseal when the water stops beading, and go at the grout with the mildest thing that works rather than the strongest thing under the sink. Keep the brush where the job is: one in the shower caddy, one under the kitchen sink, so reaching for it costs you nothing.
Do the squeegee and the fan for a month and you will notice something: the grout in the shower does not get to the point of needing this article. That is the whole game. Hang the squeegee inside the shower where your hand already goes on the way out, and put the water test on a schedule you cannot forget: flick a few drops on the grout when you change the smoke alarm batteries, and again when the heat comes on in the fall. If it still beads, you are current, and the deep clean stays a thing you choose to do rather than a thing the bathroom demands of you.
In This Guide
- Best grout cleaner
- Best products to clean ceramic tiles
- Choosing tile grout colors simple guide to getting it
- Cleaning grout with hydrogen peroxide and baking soda
- Cleaning porcelain floor tiles was never this easy before
- Grout removal tips
- Grout sealer reviews
- How to change grout color
- How to clean glass tiles
- How to grout tile floors
- How to remove grout sealer from tiles
Ray Mercer
Staff Writer
Ray Mercer has spent thirty years keeping old houses running and has fixed most things twice, the second time correctly. He believes the majority of household problems fall to patience, a clean work area, and a twelve dollar part, and he will tell you plainly which jobs are not yours to do.