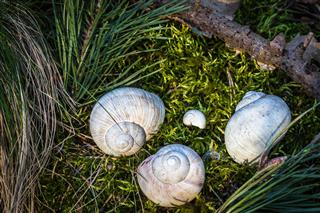
Collected for decorative and food purposes, conchs are denizens of the sea with beautiful shells. If you collect shells regularly, you would know that these shells are filled with sand and many microbes. In this article, we will look at the various processes and tips that can be used to correctly clean and polish a conch shell.
Quick Tip!
Some states have laws that prohibit people from collecting shells from the beaches, depending on whether a live animal inhabits the shell or not. Therefore, it is recommended that you check the rules and regulations with local authorities before you start your collection.
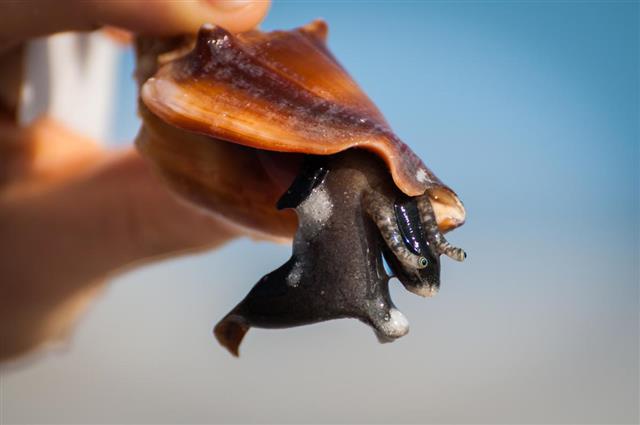
Conch shells are found on a type of sea-snail that is called marine gastropod mollusks. These shells come in a wide range of colors, such as white, beige, pink, yellow, brown, etc. The conchs are collected for their shells, which are used as decoration pieces or musical instruments, while the animal inside might be used for food.
While these shells might contain a lot of dirt and debris, it is not difficult to clean them and reveal the shell’s true beauty. If you are choosing a shell merely for decorative purposes, it is recommended that you pick up only those shells which do not have an animal living inside, since the dead animal inside the shell will contain germs and will emit a foul odor. However, if you must use a shell that has an animal inside, here are a few techniques for removing the conchs from the shells.
Removing Conchs from Shells
- Burying: This is an easy, but slow process for cleaning shells with live animals. Dig a hole in a dry patch of soil and bury the shells inside. Make sure you place a marker so that you remember where you kept them. Leave the shells in the soil for a month or two, which will allow worms, insects, larvae, and the microbe in the soil to consume any animal tissue in the shells.
- Freezing : Put the shells in a water-tight bag, fill it with water, and put it in the freezer. After a few hours, remove the bag from the freezer and allow it to defrost completely. Now, use tweezers, brushes, and other tools to gently remove the dead animal from inside the shell.
- Boiling: Put the shells inside a pot of water and bring it to a boil. Leave the shells to boil for 10 – 15 minutes. Use a pair of tongs to remove the shells from the water, and gently pull out the animal tissue from inside.
Now that you have removed all animal tissue within the shell, let us look at how one can clean the shell to bring out its true appeal.
Cleaning the Shells
- Soak the shell in a bucket of clean water for an hour. This will make it easy to clean all the dirt and debris after you get the shell out of the water. Discard the dirty water.
- Rinse all the dirt from the bucket and pour in a solution on 1 part bleach and 3 parts water. Be sure to wear protective clothing and eye-wear while handling the bleach.
- Carefully place the shell in the solution, and let it soak for at least 24 hours. This will kill all the microbes on the shell and remove any bad odors that are emitted. It also helps in loosening debris such as barnacles that might be stuck to the shell.
- Remove the shell from the bleach solution and rinse it well under tap water.
- Use a brush to scrub out the debris and periostracum on the shell. If any of the barnacles are stubborn, carefully use a small screwdriver and a hammer to slowly chisel them out.
This is a very effective method of cleaning shells. However, if done incorrectly, the bleach tends to destroy the natural color of the shell, and the smell of bleach does not leave easily too. So, if you do not like taking your chances, let us look at how we can clean the shells without using any bleach.
Cleaning Conch Shells without Bleach
- Soak the shells in a bucket of clean water for 5 – 6 days. Remember to replace the water in the bucket daily during this period.
- Now boil the shells in a pot of water to kill any residual bacteria that may be left on them.
- Allow the shells to dry completely, and then use a piece of sandpaper to gently rub out all the debris and barnacles off the surface.
- Alternatively, apply a generous coat of toothpaste on the shells, and let them rest for a few hours, before using a brush to clean out the gunk.
You might notice that some of the original color of the shell has disappeared during the cleaning process. However, there is no need to worry, as the color will return after polishing the shells.
There is another method to clean the grit layer on the surface of the shells. Simply place the shells in an area where you get good sunlight, for 2 – 3 weeks. The sun will cause the grit layer to flake, and that makes it easy to peel off. However, it is important that this method is used only on those shells that are originally white in color, as the sunlight will bleach out any color that may be on the shell.
Polishing Conch Shells
Polishing the shells will not only bring out the colors of the shell but also help in its long-term preservation.
- For this process, you can use either mineral oil or baby oil, both of which are easily available at all pharmacies. All you need to do is lightly dip a clean and soft piece of cloth in the oil and wipe it all over the shells.
- Let the shells dry for at least an entire day, and wipe off any excess oil.
- Carefully apply a coat of clear nail polish, followed by another day of drying.
This will bring out the shine and colors of the shells beautifully.
So that’s how to clean a conch shell. Some really easy and fun ways to get conch shells that look great and will last for many years to come. You can also involve kids in this as a good holiday project.
